
Understanding the Basics of Clay Brick Manufacturing
History and Evolution of Clay Bricks
The first fired clay bricks appeared around 7,000 years ago in the fertile valleys of Mesopotamia, and their impact was nothing short of revolutionary. These early builders discovered that shaping mud and baking it could create a material far more resilient than stone in some ways, allowing for the construction of entire cities. This ancient craft laid the foundation for modern masonry practices, and the methods have evolved remarkably through the centuries. Over time, the use of local soils, combined with the invention of the kiln, transformed a simple sun dried block into a durable, weather resistant building element. Today, the time honoured process of making clay bricks remains both a tradition and a precision trade.
The narrative continues on the African continent, where the craft adapted to unique regional conditions. Historical sites show a progression from hand moulded, sun baked units for homesteads to the more robust, kiln fired products used in colonial era townships and modern urban developments. It is fascinating to see how this evolution has shaped the industry we know today. A brick made in a modern plant still honours the ancient principles of earth, water, and fire.
Here is a quick look at the evolutionary milestones of the fired clay brick:
- The shift from random adobe blocks to standardized, rectangular moulds for uniform building.
- The development of permanent field kilns, which replaced temporary clamp firing, allowed for greater control over temperature.
- The introduction of extrusion technology in the Industrial Revolution, which dramatically increased the speed of production.
The story of this humble unit is far from finished. As we look at sustainable building practices, the energy efficiency and lifecycle of clay remain impressive. The evolution of the brick narrative is linked to our own, and understanding it helps us appreciate the very ground we build upon. For anyone involved in construction or renovation, the history of this material adds a layer of depth to the straightforward process of making clay bricks today.
Essential Tools and Equipment Needed
There is a quiet tension before a kiln is opened. Understanding the basics of making clay bricks starts with the raw material. Clay soils need the right balance of silica and alumina, plus sand to prevent cracking during firing. The process demands precision, but the tools are simple: a sturdy mould, a flat drying rack, and a kiln capable of sustained temperatures around 1,000 degrees Celsius.
The equipment list is short and unforgiving. A box feeder regulates the raw material, while a pug mill mixes water and clay into a homogenous mass. Larger operations use extrusion machines to form continuous columns, with cutting wires slicing individual units.
Standard setup includes:
- Blunger for slurrying raw clay
- Filter press to remove excess moisture
- De-airing extruder to eliminate air pockets
Even a modest manual setup for making clay bricks demands close attention to moisture levels and drying times before firing.
Safety Considerations and Best Practices
The hazards of making clay bricks announce themselves long before the kiln is lit. Crushing raw material releases respirable crystalline silica, scarring lung tissue. South African brickworks contend with radiant heat from kiln surfaces exceeding 1,000 degrees Celsius. The quiet injuries, the aching back, the cracked knuckles, go unnoticed.
Safety measures work when woven into the rhythm of making clay bricks. Damp stockpiles suppress dust. Extraction hoods above pug mills capture what moisture cannot. Workers rotate from the kiln face in summer. A mask that does not fit protects no one!
- Masks need individual fit testing
- Burn dressings belong in every first aid box
- Water stations around the yard encourage hydration
The Occupational Health and Safety Act of 1993 obliges South African employers to document risk assessments. I have seen registers untouched for years. That document matters less than the supervisor who walks the floor wearing a respirator.
Preparing and Processing the Clay
Quarrying and Extraction Methods
South Africa’s clay beds have been forming for hundreds of millions of years. That antiquity matters. Weathered clay delivers the plasticity needed for making clay bricks that hold their shape. Extraction begins by stripping the overburden, the topsoil hiding the deposit. We ignore this layer at our peril, as contamination ruins the batch.
Open-pit methods dominate. The quarry face is cut in benches, each step exposing fresh, unweathered material. Hydraulic excavators load haul trucks, but the sharpest operators blend clays from different benches to stabilise consistency.
A well-run pit pulls clay in sequence:
– Remove and stockpile topsoil for later rehabilitation
– Test the clay’s shrinkage and sand content before mass extraction
– Expose the seam, then excavate in horizontal slices
Only then does the material travel to the pug mill. The choices made on the quarry floor determine whether making clay bricks ends in smooth rows or cracked rejects. Every load carries the pit’s signature.
Weathering and Aging the Clay
A fresh clay pile is not ready for anything. Weathering and aging transform this raw material into a forgiving medium. Rain and frost break down aggregates, while bacteria and organic matter work through the mass, increasing plasticity. This process takes weeks, even months, depending on the climate. A seasoned brickmaker tests the clay by slicing it with a wire. If the cut is clean and the surface feels supple, the clay is ready. Key indicators of properly aged clay:
- Uniform moisture throughout the pile
- No hard lumps when squeezed
- A subtle earthy smell, not sour
Only then does the pug mill receive its batch, setting the stage for making clay bricks that dry without warping.
Cleaning and Removing Impurities
The time for patience has passed. After weeks of weathering, the clay now requires scrutiny. Any embedded stone, root, or lime nodule will become a defect during firing. These impurities wait until the kiln reveals their presence.
Cleaning begins with a wire screen. We break the aged clay into chunks, then force it through a mesh. For larger operations, a de-stoner or wash mill separates heavier particles. A single flint pebble can fracture a finished brick.
Common offenders in unprepared clay:
- Flint and quartz
- Organic roots
- Lime nodules
Each impurity compromises the final product. We run our fingers through every batch, feeling for stone. Only when the clay responds as a uniform paste does it proceed. This vigilance is essential for making clay bricks that survive the kiln’s fire.
Crushing and Grinding for Consistency
Crushing begins after cleaning. The purified clay arrives in irregular blocks, some as large as a human head. This variation must be broken down.
A roller crusher or pug mill grinds the material into a consistent particle size. This matters more than most realise. Uneven particles create uneven drying and firing. A brick that dries unevenly will warp or crack before it reaches the kiln. For making clay bricks, this stage decides whether a batch becomes a solid wall or a heap of rubble.
We pass the crushed clay through screens of increasing fineness. Finer material produces denser bricks with fewer voids.
The goal is a material that behaves predictably. I have seen batches ruined by haste, where workers skipped a pass to save time. The resulting bricks emerged with spiral fractures. Consistency is the master here, the quiet discipline behind making clay bricks that survive the fire.
Mixing and Blending with Additives
Clay is a stubborn material. Straight from the crusher, it often has a personality that leans toward brittleness and excessive shrinkage. This is where the alchemy of additives saves the day. We mix in temper materials such as sand, grog, or even sawdust to control the clay’s behaviour during the drying process.
Without proper blending, you are essentially building a tiny, fragile ecosystem destined for failure. The reasons for adding these materials are straightforward:
– Sand reduces shrinkages and prevents cracks.
– Grog, which is crushed, pre-fired clay, adds structural integrity.
– Sawdust burns out during firing, leaving tiny air pockets for better insulation.
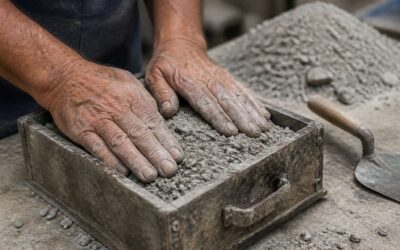
The mixing method matters. Horizontal spiral blenders or rotating drums ensure every particle gets an equal opportunity to bind with its neighbour. A poorly mixed batch guarantees spotty shrinkage, which leads to warped, sad-looking bricks. No amount of firing can fix a poorly blended beginning. For making clay bricks, the mixer is your first chance to instil character. Add water gradually, roughly 10% to 15% by weight, until the mass holds together when squeezed. It should not be soup. It should be dough.
Achieving the Right Plasticity for Molding
Plasticity sits between two measurable extremes: the liquid limit and the plastic limit. In South Africa’s heat, a batch can swing between those extremes in minutes. I have watched experienced hands walk away from a pile because it felt off, and return an hour later when the moisture had settled. Achieving the right plasticity for molding is about timing as much as technique.
Use the roll test. Take a small portion, roll it into a thread, and wrap it around your finger. Cracks along the outside mean the clay is too dry. A thread that cannot hold its shape means too much water. This calibrated rhythm matters more than any recipe, and it is the true foundation for making clay bricks.
Molding and Shaping Techniques
The Soft Mud Process Explained
The moment clay transitions from a blended mass into a structured unit is where skill becomes tangible. The Soft Mud Process is the most direct route to this transformation, a method that relies on the plasticity you achieved in the previous stage. Here, the moisture content is your ally. The clay is soft enough to be pressed into a mold, yet firm enough to hold its shape once released. This technique is favored for its speed and simplicity, particularly for producing common bricks that will later be rendered or plastered.
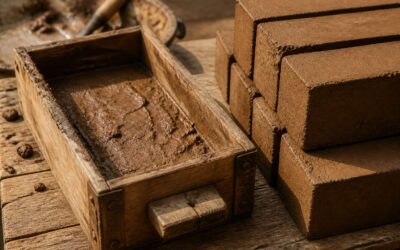
Within this process, the mold itself is the star. It is typically a rectangular frame with no bottom, designed to be filled, struck off, and lifted away. The key to a clean release lies in the preparation of the mold. For the Soft Mud Process, this means the mold is either dipped in water or dusted with sand before each use.
– Water acts as a lubricant, allowing the clay to slip out cleanly.
– Sand creates a gritty barrier, which also imparts a texture to the brick’s surface, aiding in mortar adhesion later on.
– Some producers use a slop mold, which is continuously kept wet to prevent sticking.
After the mold is lifted, the wet brick sits on a pallet board. These boards are then moved to the drying yard, where the bricks must lose enough moisture to become leather-hard before they can be handled further. The dance between the moisture in the clay and the air in the yard is a delicate one; too much sun and the edges will dry faster than the core, causing cracks. This careful choreography is the heartbeat of making clay bricks, a process that rewards patience and punishes haste. The consistency of your mix and the rhythm of your molding define the integrity of every single unit you produce.
Understanding the Dry Press Process
When the dry press machine thundered into service in the late 1800s, the craft of molding changed forever. Here, water is almost an afterthought. The clay, ground to a fine powder, carries only five to seven percent moisture. A steel plunger then exerts pressure, compacting the material into a shape of sharp edges and unyielding density. No drying yard patience is required before you can handle the result!
The method carries a quiet tragedy. The operator must feed it clay fine enough to pass strict scrutiny, because any impurity becomes a fracture line under pressure. Yet for that cost, the machine returns a stark uniformity. The dry press buildings of early Johannesburg still stand as testament to this bargain. When making clay bricks through this process, the same motions repeat daily, and I find the beauty lies in that measured certainty.
Extrusion and the Wire-Cut Method
A single wire cuts around one hundred and twenty bricks every minute. No moulding bench matches that pace. The clay enters the extruder as a stiff column of dough, forced under vacuum toward a shaped die.
The die forms the profile. A wire swings across, slicing bricks onto the conveyor. The fresh cut leaves a rough texture that mortar grips firmly. Moisture sits near twenty percent, far higher than dry pressing. Too stiff, the column tears. Too soft, it slumps.
In South African plants, wire-cut lines run with a small crew. I have seen operators catch a shift in the column before it ruined a batch.
- The vacuum chamber clears air pockets before they create weak layers.
- Dull wires drag and smear instead of slicing cleanly.
- Column speed reveals auger pressure changes early.
Making clay bricks through extrusion means trusting that moving column. It tells you everything about the batch.
Hand Molding versus Machine Molding
A skilled hand molder shapes eight hundred bricks in a day, pressing clay into a wooden mould with a practiced swing. The sand they use to dust the mould leaves a rough, porous face when making clay bricks. Machine molding uses metal dies and water, producing a tighter, smoother unit in seconds. The speed is undeniable, but the feel changes with the handmade approach. In the rural Western Cape, I have seen builders refuse machine-made units for extensions, preferring the slight wobble of the hand-made clay. Their mortar grips the pitted surface, and the texture breathes. The choice comes down to volume versus character.
Here is the practical difference:
- Hand molding relies on the thrower’s timing to eliminate air pockets.
- Machine molding relies on consistent auger pressure.
Both have their place, but a hand-molded brick always tells you who made it.
Using Molds and Release Agents Effectively
A mould’s true character emerges only when the release agent respects the clay’s nature. In making clay bricks, the finest release is often a slurry of fine sand and water, brushed onto a hardwood mould before each drop of clay. This film prevents sticking without sealing the surface, allowing a clean edge and a skin that stays open for mortar.
For gypsum-based moulds, builders in the Western Cape sometimes turn to recycled sunflower oil to ease demoulding. The oil suits drier mixes, but it changes the texture. The same principle guides making clay bricks at scale: the release agent must match the mould’s porosity.
- Soft mud units need sand or water, never oil, to preserve the porous face.
- Dry press units tolerate oil because compaction does the work.
- Metal moulds demand constant washing to avoid rust marks.
Drying and Curing the Green Bricks
Why Proper Drying is Critical
Nearly half of all clay bricks lost to cracking are lost during drying, not firing. This is where the careful craft of making clay bricks gets truly tested. After the mold releases its grip, the green bricks hold up to thirty percent moisture. That water must leave slowly and evenly, or the brick will warp and split.
The sun and wind, while helpful, are also the biggest threats to your work in this phase. A hot South African afternoon can pull moisture from the outer shell too quickly, creating a hard crust that traps water inside. When that trapped water turns to steam in the kiln, the brick can explode. Proper drying creates a uniform moisture gradient so the entire brick shrinks together and holds its intended shape.
– Rapid drying on the outer face causes surface cracks and weakening.
– Uneven shrinkage between the core and the exterior leads to distortion.
– Bricks dried too fast are prone to breaking during handling and firing.
To dry correctly, move the green bricks to a shaded area with good airflow, and let them rest for several days. Depending on the humidity and temperature, this process can take up to ten days. You will know a brick is fully cured for the kiln when it sounds like a solid, dry ring when tapped. This gradual release of moisture sets the stage for all the heat work that follows, and it protects the integrity of everything you have built so far.
Natural Drying Methods in Open Air
In a country where the sun can be both ally and adversary, the art of making clay bricks traditionally leans on the patience of open air. Here, the kiln is not the first great trial; the sun is. After the molding bench, the green bricks are laid out on pallets or sand beds, vulnerable and still soft. The wind becomes a variable you must learn to read, as a brisk afternoon breeze can steal moisture from the surface faster than the interior can surrender it.
The process demands a gentle choreography.
– Bricks are placed on their edges to allow air to circulate beneath them.
– A light covering of straw or hessian may be used to diffuse the harshest midday rays.
– They are turned periodically to ensure every face dries with the same unhurried rhythm.
This natural approach is slow, often taking a week or more in the Highveld climate. You learn to trust the changing light and the feel of the clay against your knuckles. The reward is a brick with a uniform body, free from the internal stresses that plague rushed work. For many small operations, this method of making clay bricks remains the most reliable, a testament to the simple wisdom of letting nature set the pace.
Controlled Drying in Chamber Systems
Controlled drying in chamber systems removes the guesswork from an otherwise unpredictable stage. Unlike open air, where wind and sun dictate the pace, a chamber holds steady conditions. The green bricks rest on racks as fans circulate air at measured velocities. Humidity is held constant, sometimes through steam injection or venting. This method reduces required drying time to a few days, even in the Highveld’s variable climate.
- A slow initial phase to prevent surface crusting.
- A steady increase in temperature as moisture exits the core.
- A final equalising stage before the bricks reach the kiln.
For operations that focus on making clay bricks at volume, chamber drying provides consistency that open air cannot match. The body of each brick cures evenly, and cracking risks drop sharply. In South Africa, where seasonal rain can halt natural drying for weeks, this control makes production predictable.
Monitoring and Measuring Moisture Content
Drying green bricks is a process of subtraction, removing water without removing structural integrity. Monitoring moisture content is where the real craftsmanship emerges, separating careful producers from those who gamble with their inventory.
Moisture meters, particularly pin-type models, provide readings that guide the pace of drying. A resistance meter measures the electrical conductivity between two probes, which changes as water leaves the brick. These devices offer immediate data, allowing you to adjust chamber settings or open-air exposure without waiting for visible signs of trouble.
– Calibrate meters against oven-dry samples for accuracy
– Test multiple bricks from different rack positions
– Record readings daily to track drying curves
The target moisture for firing typically sits below two percent. Measuring the internal moisture, not just the surface, prevents false confidence. A brick might feel dry on the outside while holding significant water in its core. That hidden moisture turns to steam in the kiln, and steam expands with force. Measuring properly means the difference between a quality product and a kiln full of cracked shells. For anyone serious about making clay bricks, this step is non-negotiable.
Preventing Cracks and Common Drying Defects
Cracks appear when the outer skin dries faster than the interior. The surface shrinks while the core still holds moisture, and the opposing forces tear the clay apart. This is the most common defect in making clay bricks, entirely preventable with patience and observation.
Rapid drying causes the worst failures. Direct sun and wind pull water from the surface faster than the interior can release it. Fine hairline fractures widen as drying continues. Shade cloth and windbreaks slow the process. Turning bricks regularly exposes all faces equally.
- Stack bricks with space for air movement
- Turn each brick daily during the first three days
- Cover stacks during midday heat
Uneven settling also produces warping. Soft bricks slump under their own weight when moved too soon. A brick must hold its shape before handling. The thumb test remains reliable: press a thumb into the surface, and if the mark disappears, the brick is too wet to move.
Firing and Hardening in the Kiln
Types of Kilns Used for Clay Bricks
A dried brick dissolves in a rainstorm. Firing fixes that! This stage transforms clay into a durable ceramic. For anyone involved in making clay bricks in South Africa, the kiln type determines strength, colour, and thermal behaviour of the final product.
Small-scale yards often rely on clamp kilns, where bricks stack in a beehive form and heat rises through the pile over a week or more. Larger operations favour the Hoffmann kiln, a continuous system that fires bricks in one chamber while preheating another.
- Clamp kiln: low setup cost, uneven temperature zones
- Hoffmann kiln: continuous operation, moderate efficiency
- Tunnel kiln: precise control, high capital investment
Tunnel kilns move bricks on conveyors through fixed heating zones, giving consistent output for commercial projects. Each system burns fuel differently, so operating costs vary widely across South African regions.
Loading and Stacking Green Bricks Safely
Loading green bricks into a kiln demands patience. One careless grip can crack a brick that took weeks to prepare. I have seen strong stacks fail because someone rushed the final row. Before firing begins, inspect every surface for hairline fractures, since these flaws expand under heat.
Stacking follows strict rules for airflow and weight distribution. Bricks need even gaps so flames reach every face. The base rows carry the heaviest load, so they must contain the strongest bricks. Consider these stacking principles:
- Leave uniform spaces between bricks for consistent heat penetration
- Place larger bricks at the bottom of the stack
- Keep stacks clear of the kiln wall to prevent cold spots
Anyone making clay bricks in South Africa knows that careful loading prevents costly failures. A collapsed stack ruins days of work and can damage the kiln structure itself. Safety begins with the loader’s hands, not the fire.
Managing Temperature Ramp and Soaking Times
The kiln is a harsh examiner. During firing, the temperature ramp determines whether you get a durable product or a pile of rubble. Rapid heating forces steam through the clay matrix too quickly, causing cracks and spalling. Seasoned brickmakers in South Africa know that controlling this climb is the most stressful part of the entire operation.
Soaking is a different challenge. Once the kiln reaches the target temperature, holding it there lets the heat penetrate every brick core. A short soak leaves the center underfired, while an excessive one wastes fuel and risks vitrifying the surface. When making clay bricks, the soaking time directly affects the final strength and frost resistance of the unit. Temperature equalization matters more than raw heat.
- Raise the temperature slowly through the 200°C to 400°C range
- Hold the kiln steady during the quartz inversion phase
- Measure the soak time from the moment the interior thermocouples stabilize
Cooling deserves equal respect. Many people assume the work ends when the burners shut off, but a sudden cold draft can shock the brick body. Managing the ramp on the way down prevents thermal shock and internal fractures. Firing and hardening in the kiln is a patient craft. Watch the pyrometric cones, trust the schedule, and let the fire do its quiet work. That is the essence of making clay bricks that last.
Controlling Atmosphere During Firing
The atmosphere inside the kiln during firing is an underappreciated variable. While temperature controls the physical transformation, the surrounding gases control the chemical reactions. A flame that runs with excess oxygen creates an oxidizing atmosphere, which burns off carbon and produces a consistent red or buff body. When the damper is closed and oxygen starves the fire, the kiln shifts to a reducing atmosphere. This pulls oxygen from the iron oxides in the clay, altering the brick’s color and often increasing its density. Both states have their place in making clay bricks.
Managing this environment requires reading the fire. Watch the flame through the peep holes. A clean, sharp flame indicates complete combustion, while a lazy, smoky flame signals reduction. The draft is your main lever. Adjust the chimney damper to control oxygen flow. For most South African clays, a neutral to oxidizing atmosphere during the final soak prevents black cores and bloating. Use this as a practical guide:
– Maintain a clear exhaust to prevent sulfur stalling the fire
– Increase airflow during the final hour to even out color
– Avoid opening the kiln during reduction to prevent cold air entry
The goal is consistency. A brick fired in a stable atmosphere develops an even structure. Let the kiln breathe, and the clay will respond with uniform strength.
Cooling and Annealing Processes
Once the kiln peaks, the damper closes and the slow descent begins. Annealing, the controlled cooling of the brick body, locks the minerals into their final crystalline form. A brick that cools too quickly develops micro-fractures, invisible but fatal to its strength. The craft of making clay bricks rests on this patience.
South African clays demand respect for the cooling curve. The kiln holds its heat for hours, sometimes a full day, before the first vent opens. I have watched brickmasters leave the firebox sealed until the exterior cools. This restraint prevents the thermal shock that shatters the body. The annealed brick emerges uniform.
The cooling sequence follows a steady rhythm:
- The damper shuts fully and the heat holds for six hours
- The flue access opens slowly to lower the temperature
- The firebox door cracks open only below 200 degrees Celsius
This gradual release of heat is the final discipline in making clay bricks. The fire departs, but the hardening continues.
Color Variations and Glaze Effects
In the firing chamber, temperatures climb past 900 degrees Celsius. Iron oxides react to the available oxygen. A reducing flame pulls oxygen from the clay, turning common red bodies into dusky purples and charcoal greys. An oxidizing flame leaves the brick in terracotta and ochre. The color of the finished unit depends on these choices.
South African clays carry specific mineral signatures. Manganese deposits yield slate tones, while lime introduces pale creams. Glaze effects are rare in standard brickwork, but a salt glaze thrown into the firebox at peak temperature creates a glassy, amber skin. This quiet transformation is one of the enduring satisfactions of making clay bricks.
Quality Control, Finishing, and Storage
Testing Brick Strength and Durability
After the kiln cools, the true character of the brick emerges. Quality control starts with a simple visual sweep for cracks, warps, or discolouration. We tap samples for a clear ring, a sound that indicates proper vitrification. The eye, however, only reveals so much.
Strength and durability demand more invasive scrutiny. Compression tests crush sample bricks to the point of failure, while water absorption trials reveal porosity. South African brickmakers must also watch for efflorescence, those ghostly salt stains that appear after wetting. Common checks include:
– Compressive strength tests
– Water absorption percentage
– Efflorescence ratings
Finishing removes burrs and sharp edges, giving each unit a clean face. Finally, storage matters. Stacked on pallets in ventilated sheds, bricks cure evenly and keep their integrity. The entire practice of making clay bricks hinges on these quiet, meticulous final steps.
Identifying Common Defects and Their Fixes
When the tests pass, the quieter work begins. Hairline cracks often trace back to uneven drying, solved by adjusting airflow in the chamber. Warped units signal rushed molding or inconsistent clay moisture, both correctable before the next batch leaves the mixer.
The most deceptive issue is lime popping. Tiny white craters appear months later when moisture hits unburnt limestone. Crushing and screening the raw material more thoroughly prevents this. Efflorescence responds to changes in firing temperature and longer soaking times.
- Cracks: slow the drying rate or modify sand content
- Warpage: ensure uniform moisture before molding
- Lime pops: refine the crushing and screening stage
- Efflorescence: raise the peak firing temperature
Storage makes the final assessment. Bricks left exposed to rain develop moss and uneven curing. Ventilated sheds with proper pallet spacing keep units clean and dry. Every defect traces back to a specific step in making clay bricks, and each fix sits within the maker’s control.
Sorting and Grading Finished Bricks
Quality control in making clay bricks turns raw production into a dependable product. We run a caliper over every tenth brick and a straightedge along its bedding face. Any unit that wobbles or chips gets pulled aside. Finishing completes the process. A quick wire brush removes loose particles, and a misting spray settles residual dust.
After finishing, we sort and grade every batch.
- Grade A features perfect edges and uniform tone, ready for exposed facades.
- Grade B accepts minor blemishes, suitable for general masonry.
- Grade C, the hardiest but least attractive, goes to foundations and internal walls.
Each grade sits in its own bay under a ventilated shed. This sorting protects the reputation of every brick we make, and it proves that discipline in making clay bricks never ends at the kiln!
Best Practices for Packing and Storage
A freshly graded brick still holds moisture and salts that can migrate if stored carelessly. The final test in making clay bricks is not the kiln, it is the stockpile.
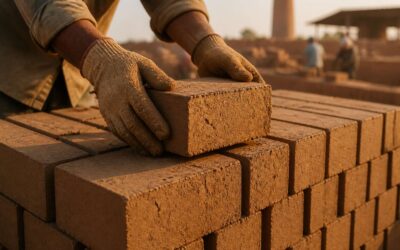
We pack each grade on wooden pallets with a plastic sheet beneath, never directly on earth. Moisture wicks up from bare ground and leaves efflorescence on the lower courses. We stack bricks in a stretcher bond, leaving finger holes between units for airflow.
Our storage shed has a 30 degree roof pitch and open sides to prevent condensation. We wrap pallets in breathable polypropylene, not plastic film, because trapped humidity breeds mold. The entire packing and storage system exists because making clay bricks well means controlling every variable until the moment of delivery.
Every Monday we check the bottom pallets for spalling or frost damage. This routine sounds mundane, but it decides whether our bricks arrive whole or crumble before they ever meet a trowel.
Environmental and Sustainability Considerations
Quality control in making clay bricks begins long before the kiln cools. We sample every batch at three stages: wet clay, dried green ware, and fired units. Each sample runs through a battery of checks:
- Compression strength
- Water absorption
- Efflorescence potential
- Dimensional tolerance
Finishing touches matter more than buyers realise. We brush off kiln dust, sort by shade, and set aside hairline cracks for crushing. That crushed material goes back into the soil blend. Nothing goes to waste.
Environmental considerations shape every decision in making clay bricks. Our kilns burn methane from a nearby landfill, cutting our carbon footprint by a third. We recycle process water through a closed loop, a necessity in a water-scarce country. Storage areas drain runoff into settling ponds, so nothing contaminates the water table.
Making clay bricks well means respecting the earth that provides the raw material, and the people who will live inside the walls we help build.
0 Comments